
Contents Overview
Introduction
So before getting into the details of API Testing or how to perform API testing, I think it is relevant to discuss why API testing is essential.
As we all know, the main objective of API testing is to ensure that the API is working as expected under all positive and negative scenarios. API testing is not only about testing the functionality but also about testing its reliability, performance, and security.
Apart from this, there are a couple of other factors that make API testing important
- API Testing has broader test coverage when compared to unit testing as it helps in identifying bugs at the unit, database, and server levels.
- API Tests can run faster compared to UI tests. As the time taken for the page load and identification of web elements is not required in API testing
- The core functionality testing can be started before the user interface is ready so that errors or weaknesses can be identified in the early phases of development. These errors may be costly to fix and may require a significant amount of code change if specified later.
- There are many tools and libraries to automate the API calls, using which we can create an automation test suite that can be hooked to the deployment process.
- One who performs API testing will get a better understanding of the application features and flow
- API Testing helps in checking the performance as well as security of the APIs
There is much software available for API Testing and one of the main software is POSTMAN. In this blog, I am going to explain how to configure and execute a simple REST API request in Postman.
What is POSTMAN?
POSTMAN is an API client used to develop, test, share and document APIs.Postman is available for Windows, Linux, and Mac as a standalone application.
- Go to https://www.getpostman.com/apps and download PostMan for your Operating System
Click on the downloaded executable file and install it on your system.
- Or else you can use the PostMan web application.
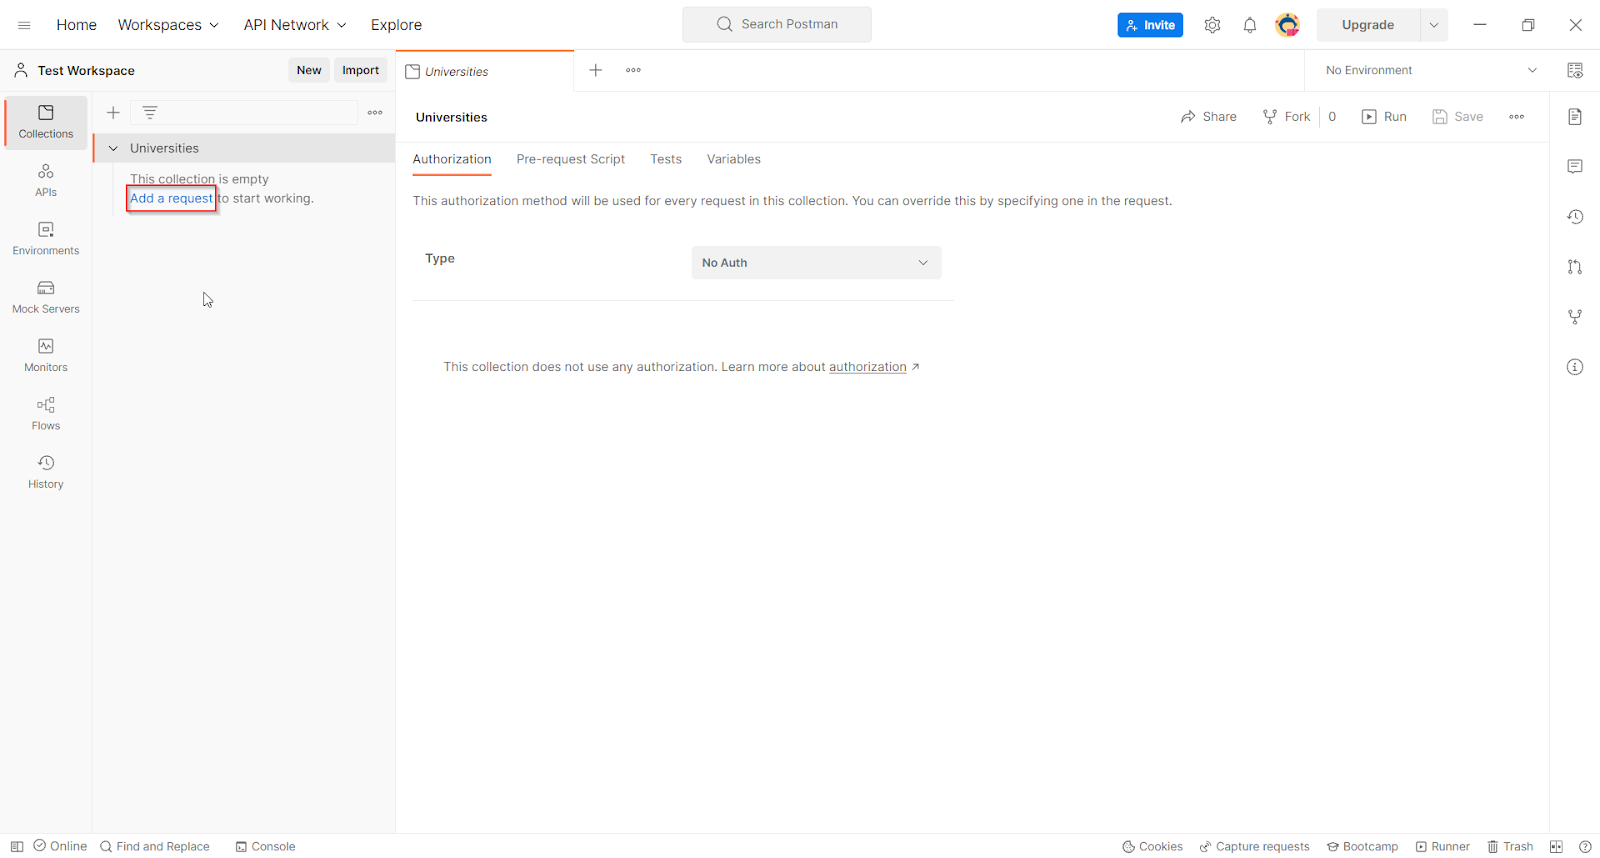
Creating a new Collection in PostMan
In Postman similar kinds of requests can be grouped into a collection and on opening a collection we will get all the requests under that collection. Its acts like a folder for the files in our system
Click on the New button in the header and create a new Collection

Creating a new GET request in Postman
I am using a sample public REST API –
http://universities.hipolabs.com/search?name=middle from the below link – https://documenter.getpostman.com/view/
8854915/Szf7znEe#068625c4-95f6-4e06-afb3-7ca055e72eb0.
It is a GET request that accepts a parameter called ‘name’ and searches for a university whose name contains the value of ‘name’
Click on ‘Add a request’ under the collection
Enter a meaningful name for the request

Select the request type – whether GET, POST, PUT, or DELETE … Here it is a GET request
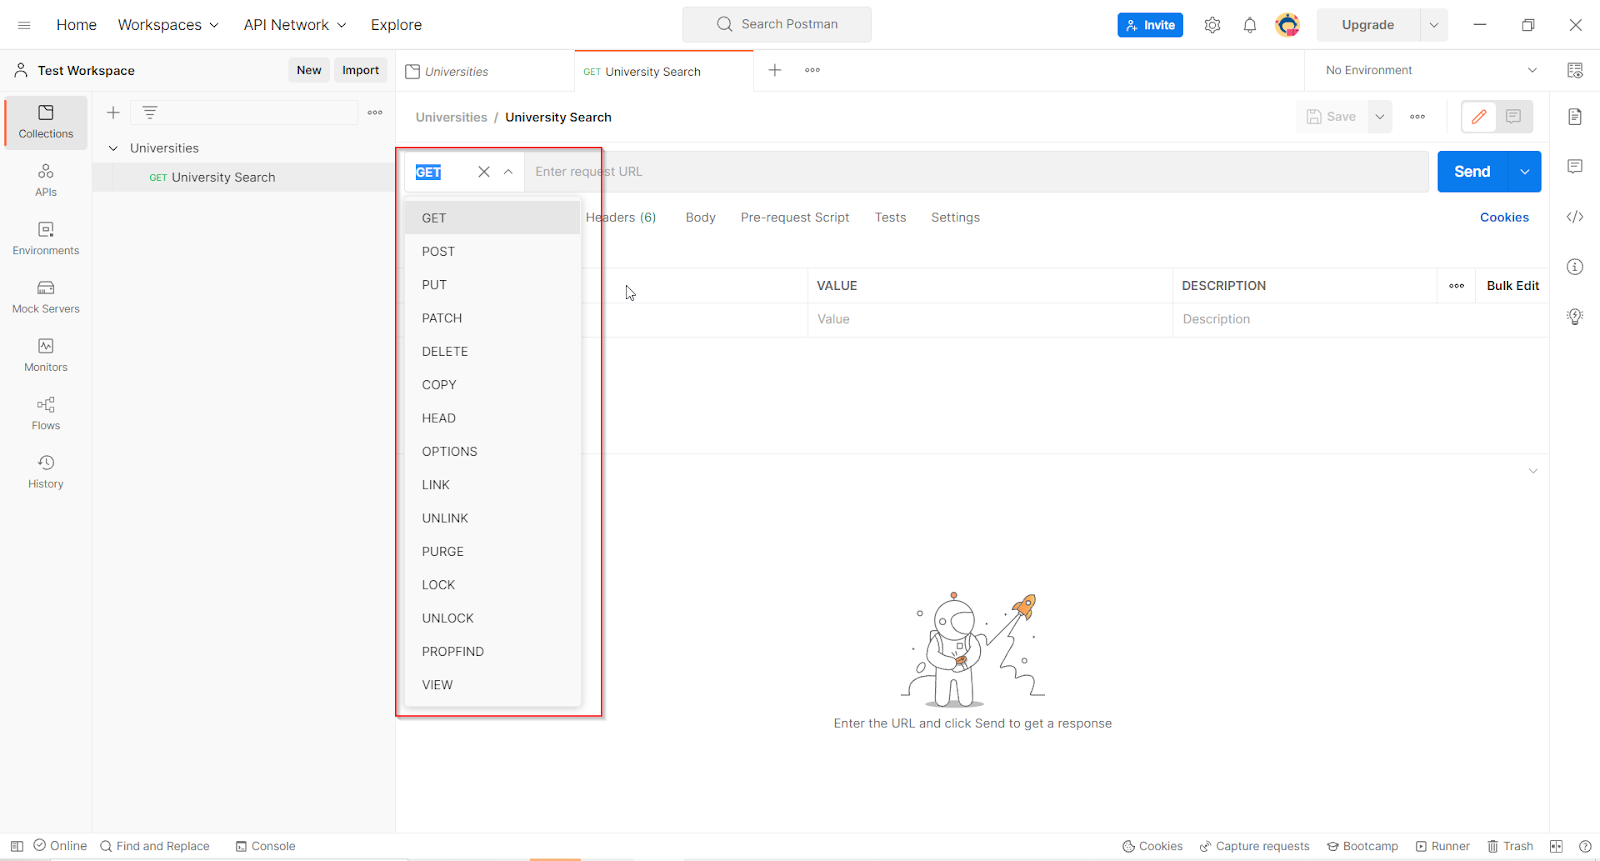
Enter the request URL
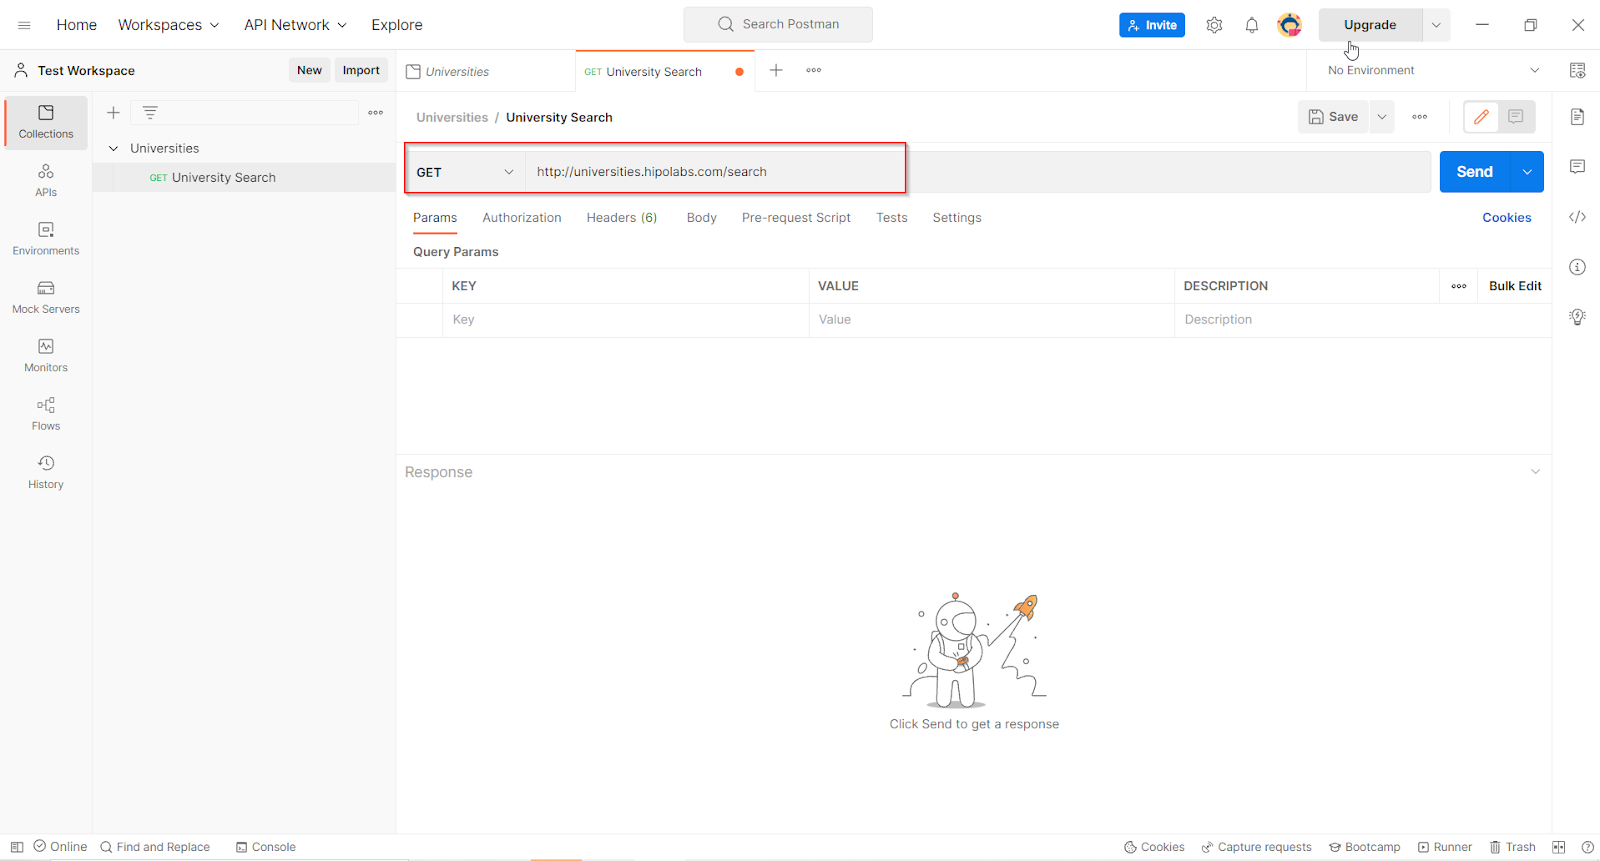
As this API is expecting a request parameter ‘name’ we need to specify the same while configuring the request. For that go to the ‘Params’ tab and enter the required parameters as key-value pairs.
On entering the parameters it gets automatically appended to the requested URL

Once all the details are entered, click on the Send button to send the request.

Response in Postman
Once we click on the Send button, we will get a detailed response from the API. Postman has a beautiful user-friendly interface for a response that displays the response status code, response body, response cookies, and headers.
We can view the response in 3 ways :
- Pretty – The content will be more readable with colored keywords
- Raw – Raw version without any colorful keywords
- Preview – Shows the preview of the page as you would have seen in the browser

Likewise, you can try configuring other types of requests (POST, PUT, DELETE…) and see the response for those requests with different combinations of data and explore the wide possibilities of Postman.
More Blog: 6 API Security Best Practices: Protect APIs with mTLS, JWT, and Positive Security


