Best Proven Ways to Cut Kubernetes Cloud Costs by 30% Using FinOps in 2026

Best proven ways to cut Kubernetes cloud costs by 30 percent using FinOps in 2026 infographic

Kubernetes clusters are expensive to run and expensive to understand. Most engineering teams know their monthly bill; almost none know which workload, team, or feature is responsible for which portion of it. That information gap is where cloud waste lives.

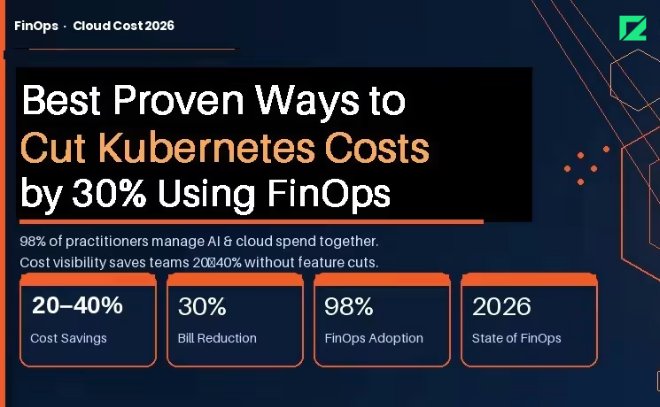
The FinOps Foundation’s State of FinOps 2026 report documents the gap precisely: 98% of FinOps practitioners are now managing AI and cloud spend together, and pre-deployment cost visibility is the top desired capability across organizations of all sizes. Teams that have built this visibility are cutting their Kubernetes bills by 20 to 40 percent without removing features or downgrading performance.

This guide covers the specific practices, tools, and architecture decisions that make that possible.

Why Kubernetes Costs Are Hard to Manage

Traditional cloud cost allocation works at the service or resource level. Kubernetes adds two layers of abstraction: pods share nodes, and nodes are grouped into clusters. A single node bill might represent traffic from a dozen different applications owned by three different teams.

Without active cost attribution, the bill is opaque. You know you spent $40,000 on compute in March. You do not know that $18,000 of that came from a batch job that runs once a day and could run overnight on Spot instances at one-fifth the cost.

The three root causes of Kubernetes waste:

  1. Overprovisioning: Teams request more CPU and memory than workloads use, because the cost of over-requesting is invisible and the cost of under-requesting is an outage.
  2. Idle capacity: Nodes that stay running overnight and on weekends for workloads that only run during business hours.
  3. Unattributed spend: No namespace-level or label-level cost breakdown means no team feels accountable for their portion of the bill.

Step 1: Get Cost Visibility Before You Optimize:

You cannot optimize what you cannot see. The first step is establishing namespace-level and workload-level cost attribution.

GKE Cost Allocation (Now Generally Available) : Google Kubernetes Engine’s cost allocation feature, which became generally available in 2025, breaks down billing by cluster, namespace, and label, and exports that data to BigQuery. If you are on GKE, this is your starting point. Enable it today.

In your GKE cluster settings, enable the Cost Allocation feature under Networking. Configure a BigQuery export in your billing settings. Within 24 to 48 hours you will have namespace-level cost data you can query directly.

A basic BigQuery query to see cost by namespace:

SELECT namespace, SUM(cost) as total_cost FROM `billing_export.gke_cost_allocation`
WHERE DATE(usage_start_time) >= DATE_SUB(CURRENT_DATE(), INTERVAL 30 DAY) GROUP BY
namespace ORDER BY total_cost DESC;

For Multi-Cloud or Self-Managed Clusters : Tools like Kubecost, OpenCost (CNCF open-source), and Finout provide namespace and label-level cost attribution across AWS EKS, Azure AKS, and self-managed clusters. Kubecost’s free tier covers a single cluster; the paid tier adds multi-cluster rollup and anomaly detection.

The minimum label taxonomy to enforce across all workloads:

  1. team: the owning engineering team
  2. service: the product or service name
  3. environment: production, staging, development
  4. cost-center: the budget code for chargeback

Step 2: Rightsize Before You Buy More

Most Kubernetes performance problems are attributed to insufficient resources, so teams over-provision. The data consistently shows the opposite: the average Kubernetes cluster runs at 20 to 30 percent CPU utilization and 40 to 60 percent memory utilization under normal load.

Vertical Pod Autoscaler (VPA) for Rightsizing Recommendations : VPA in recommendation mode (not enforcement mode) analyzes actual pod resource usage and recommends right-sized requests and limits without changing anything automatically. Run it for two weeks, review the recommendations, and apply changes manually to critical workloads.

To deploy VPA in recommendation mode for a deployment:

apiVersion: autoscaling.k8s.io/v1
kind: VerticalPodAutoscaler
metadata:
name: my-app-vpa
spec.
targetRef:
apiVersion: "apps/v1"
kind: Deployment
name: my-app
updatePolicy:
updateMode: "Off" # Recommendation only, no automatic changes

Check recommendations after 14 days:

kubectl describe vpa my-app-vpa

Teams that right-size based on VPA recommendations typically reduce their compute requests by 30 to 40 percent while maintaining the same performance profile.

Horizontal Pod Autoscaler (HPA) for Bursty Workloads: If your workloads have predictable traffic patterns (higher during business hours, lower at night), HPA with custom metrics can scale down to minimum replicas during off-peak hours automatically. Combined with cluster autoscaler removing idle nodes, this is the single highest-ROI optimization for most teams.

Step 3: Shift Non-Critical Workloads to Spot or Preemptible Instances

Spot instances (AWS) and Preemptible VMs (GCP) cost 60 to 90 percent less than on-demand instances. They can be terminated with 2 minutes of notice. That constraint rules them out for stateful or latency-critical workloads, but opens significant savings for everything else.

Workloads that are suitable for Spot:

  1. Batch processing jobs
  2. CI/CD pipeline workers
  3. Data transformation and ETL
  4. Non-critical background workers
  5. Development and staging environments

The Kubernetes node pool configuration for Spot on GKE:

gcloud container node-pools create spot-pool \  --cluster=my-cluster \  --spot \  --machine-type=n2-standard-4 \  --num-nodes=0 \  --enable-autoscaling \  --min-nodes=0 \  --max-nodes=20

Use node selectors or tolerations to schedule appropriate workloads onto the spot pool while keeping production workloads on on-demand nodes.

Step 4: Add AI Spend to Your FinOps Scope

The FinOps Foundation’s 2026 survey found that 98% of FinOps teams are now managing AI spend, making it the fastest-growing cost category under FinOps oversight. If your Kubernetes clusters are running ML inference workloads or AI-adjacent services, those costs need the same attribution and optimization treatment as your application workloads.

Specific controls for AI workloads on Kubernetes:

  1. GPU cost allocation: Tag GPU node pools separately and require workloads to justify GPU requests. GPU nodes cost 3 to 8 times more than equivalent CPU nodes.
  2. Inference scheduling: Batch inference workloads to run during off-peak hours when Spot availability is higher and cost is lower.
  3. Model caching: Cache loaded models in memory rather than loading them on each request. Model load time is pure GPU cost with no output.
  4. Cost per inference: Track cost per model query, not just per pod. This connects infrastructure cost to product usage in a way engineers and product managers can both act on.

Step 5: Implement Chargeback to Create Accountability

The most durable cost control is not a technical optimization. It is making teams financially aware of what they consume.

Chargeback allocates actual cloud costs to the teams or cost centers responsible for them. Showback is the lighter version: teams see their costs but are not charged internally. Both work; chargeback creates stronger behavioral change.

A minimal chargeback implementation:

  1. Export namespace-level cost data weekly to a shared dashboard (BigQuery + Looker Studio, or Kubecost’s cost center report)
  2. Send each team lead a weekly cost summary email for their namespaces
  3. Set budget alerts at 80% and 100% of monthly targets per namespace
  4. Review cost anomalies in your weekly engineering sync, not in a separate FinOps meeting

Teams that see their costs consistently make different infrastructure decisions than teams that do not. The change is not dramatic; it is cumulative. Over six months, awareness alone reduces waste by 10 to 15 percent.

What 30% Cost Reduction Actually Looks Like

Based on implementations across multiple clients, the savings stack roughly as follows:

  1. Rightsizing via VPA recommendations: 15 to 25% reduction in compute spend
  2. Spot/Preemptible for non-critical workloads: 10 to 20% of total cluster cost
  3. HPA + cluster autoscaler for off-peak scaling: 5 to 10% reduction
  4. Chargeback-driven behavioral change: 5 to 15% over six months

The exact number depends on your current state. Teams with no optimization in place and no cost attribution tend to see the largest gains quickly. Teams that are already using autoscaling and have some attribution in place see smaller but still meaningful reductions.

The work is not technically complex. It is operationally consistent. The teams that achieve 30% reductions are the ones that treat infrastructure cost as an engineering metric, not an accounting problem.

Need help building a FinOps practice for your Kubernetes environment? Talk to our engineering team at Codelynks.www.codelynks.com/contact

Related Blogs: RAG vs Fine-Tuning in 2026: The Best Strategy for Your Enterprise AI

Non-Human Identity Security: 12 Controls to Secure Cloud Identities in 2026

Non-Human Identity Security dashboard showing service accounts, API keys, AI agents, and cloud identity risk controls in 2026

The Problem No One Is Prioritising

Non-human identity security is one of the biggest cloud risks organizations face in 2026. Service accounts, API keys, OAuth tokens, CI/CD identities, and AI agents now outnumber human users across enterprise cloud environments. Without strong governance, these machine identities become easy entry points for attackers.

Most security programs still treat identity security as a human problem: MFA, SSO, and role-based access control for employees. Non-human identities (NHIs) get an afterthought. They are created quickly, granted broad permissions, and rarely audited. When a developer leaves, their service account stays active. When a project ends, its API key keeps working.

The 2026 data makes the stakes clear. The top cloud security risk this year is exposure of insecure machine permissions, not phishing or misconfigured storage buckets. Identity governance for non-human accounts is the gap that attackers are actively exploiting.

What Counts as a Non-Human Identity

Any identity that is not tied directly to a human logging in interactively:

  1. Service accounts (GCP, AWS IAM roles, Azure managed identities)
  2. API keys and access tokens stored in code, config files, or CI/CD pipelines
  3. OAuth service-to-service credentials
  4. Database connection strings and secrets
  5. AI agents and autonomous workflows that access data and execute actions
  6. Webhook endpoints and event-driven function identities

The agentic AI wave has made this harder. AI agents need broad access to do their jobs: read files, query databases, call APIs, and send messages. They are powerful exactly because they can act. That power needs to be scoped carefully, but most teams are moving too fast to do it well.

Why 2026 Is a Turning Point

Three converging factors make NHI security urgent this year.

AI agent proliferation. 35.7% of organizations are now running AI or LLM workloads in production, per CSA data from March 2026. Only 19.1% report adequate visibility and controls over those workloads. AI agents authenticate like service accounts, but they make decisions autonomously. A compromised AI agent identity does not just leak data; it can take action at scale.

Attackers have noticed. Threat actors are increasingly targeting service accounts and AI agent identities for lateral movement. A service account with admin-level IAM permissions is more valuable than a compromised employee account because it does not have MFA, does not get locked out after failed attempts, and does not raise alerts when it runs at 3am.

Governance is lagging badly. Less than one in four organizations has a documented, formally adopted policy for creating or removing AI identities. Forgotten credentials (unused or unrotated keys with high-risk permissions) dropped from 84.2% in 2024 to 65% in 2026. Progress, but still two-thirds of organizations carry this exposure.

The Non-Human Identity Security Checklist

These 12 controls cover the fundamentals. If your team can check all 12 against your current cloud environment, you are in better shape than most.

Discovery and Inventory

  1. Complete NHI inventory. Run a full audit across cloud providers, CI/CD systems, and code repositories. You cannot secure what you cannot see. Tools like AWS IAM Access Analyzer, GCP Policy Analyzer, or third-party NHI management platforms give you the map.
  2. Assign ownership. Every NHI should have a named human owner and a team. When ownership is unclear, no one audits it. Build ownership into your provisioning workflow, not as an afterthought.
  3. Map NHIs to business context. Know which application or workflow each identity serves. This context is essential when triaging access reviews and decommissioning old systems.

Least-Privilege Access

  1. Scope permissions to the task. A service account that needs to read from one S3 bucket should have permission for that bucket only. Not the bucket and everything else in that region. Review and scope every NHI against its actual access patterns using cloud provider access analysis tools.
  2. Prefer managed identities over long-lived keys. AWS IAM roles, Azure managed identities, and GCP workload identity federation eliminate the need to store long-lived credentials. Use them wherever your platform supports them.
  3. Separate identities for separate functions. One service account per application function. Not one shared account for your entire data pipeline. Shared accounts mean shared blast radius.

Credential Lifecycle Management

  1. Enforce credential rotation. Set a maximum lifetime for all long-lived secrets: 90 days is a reasonable default, 30 days for high-privilege accounts. Automate rotation using HashiCorp Vault, AWS Secrets Manager, or equivalent. Manual rotation schedules are not reliable at scale.
  2. Secrets out of source code. Scan your repositories now for hardcoded credentials using tools like GitLeaks or Trufflehog. Set up pre-commit hooks and CI pipeline checks to prevent new secrets from entering the codebase.
  3. Decommission promptly. When a project ends, a developer leaves, or a system is deprecated, the associated NHIs must be revoked within 24 hours. Build this into your offboarding and system retirement checklists.

Monitoring and Detection

  1. Log every NHI action. Enable CloudTrail, GCP Audit Logs, or Azure Monitor for all service accounts and AI agents. Know what each identity accessed, when, and from where. Without logs, you cannot investigate incidents or prove compliance.
  2. Alert on anomalous access. Set alerts for NHIs accessing resources outside their normal scope, calling APIs at unusual times, or attempting actions they are not permitted to take. Behavioural baselines take two to four weeks to establish, but they are worth the setup time.
  3. Quarterly access reviews. Schedule a quarterly review of all NHI permissions against actual access patterns. Remove unused permissions. Revoke identities with zero activity in 60 days. This single practice closes most of the forgotten-credential exposure.

Where to Start

If you have not run a full NHI inventory, start there. You cannot prioritize what you have not mapped. Most teams discover three to five times more non-human identities than they expected during the first audit.

The checklist above is not a one-time exercise. It is a repeating operational cadence. Build discovery, rotation, and access review into your regular security processes, not a separate annual audit that no one has time for.

The teams that solve NHI security in 2026 will be the ones treating machine identities with the same rigor they apply to human accounts. The 100-to-1 ratio is not slowing down. Governance needs to catch up.

Need help securing your cloud identity posture? Talk to our engineering team at Codelynks. www.codelynks.com/contact

Powerful Strategies for Zero Trust Security to Boost Productivity and Protect Data in 2026

Zero Trust Security protecting business data

Introduction

Across every industry, digital transformation is accelerating business cycles — and with it, the attack surface that cybercriminals exploit. Today’s organizations face sophisticated threats that can compromise sensitive data, disrupt operations, and erode customer trust overnight. Traditional perimeter-based security models, built on the assumption that everything inside the network is safe, are simply no longer adequate against modern adversaries.

Zero Trust Security rejects that assumption entirely. Rooted in the principle of “never trust, always verify,” it treats every user, device, and application as a potential threat — regardless of whether they are inside or outside the network perimeter. The result is a security framework that is both more resilient and more adaptive than its predecessors.

In this article, we explore how adopting a Zero Trust model strengthens your security posture, reduces financial and reputational risk, ensures business continuity, and — perhaps surprisingly — actively improves team productivity through AI-powered tools.

Zero Trust Builds a Stronger Security Posture

Unlike traditional security architectures that assume implicit trust for anyone inside the network, Zero Trust verifies every access request continuously — regardless of origin. Every user, device, and application is treated as a potential threat until proven otherwise. This identity-centric approach drastically reduces risk by enforcing least-privilege access at every layer.

In practice, Zero Trust achieves this through a combination of strict Multi-Factor Authentication (MFA), real-time behavioral monitoring, and micro-segmentation of the network. These controls ensure that organizations have a clear, continuous view of who is accessing what — and can act instantly when something looks wrong. Even if an attacker obtains a set of valid credentials, the granular access controls in a Zero Trust environment prevent them from moving laterally across systems, dramatically limiting the blast radius of any breach.

Reducing Financial and Reputational Risk: The financial consequences of a cyberattack can be severe. According to IBM’s 2024 Cost of a Data Breach Report, the average cost of a data breach reached $4.88 million — a figure that encompasses data recovery, legal fees, regulatory fines, and lost business. Reputational damage compounds these costs, with long-term impacts on customer trust and brand equity that are difficult to quantify but impossible to ignore.

Zero Trust addresses both dimensions. By proactively narrowing the attack surface and containing threats before they spread, organizations that adopt Zero Trust consistently report fewer high-severity incidents and faster recovery times. For security-conscious leaders, this translates directly into lower insurance premiums, reduced legal exposure, and stronger stakeholder confidence.

Zero Trust Security: Proactive Cybersecurity for Business Continuity

A reactive approach to cybersecurity is no longer sufficient. The volume and sophistication of threats — from ransomware to supply chain attacks — demand a proactive, always-on defense strategy. Zero Trust is designed precisely for this environment.

Continuous Verification for Better Data Protection: Zero Trust enforces continuous verification of every access request, whether the user is on-premises or remote. This is especially critical in regulated industries such as healthcare, finance, and retail, where a data breach can trigger HIPAA, PCI-DSS, or GDPR violations in addition to significant business losses. For example, if an employee attempts to access sensitive financial records outside of their normal role or hours, a Zero Trust system flags the anomaly and requires re-verification — preventing both accidental and malicious data exposure.

Containing Threats to Ensure Business Continuity: One of the most dangerous business continuity risks is the spread of a security incident across interconnected systems. Ransomware attacks, for instance, have forced major organizations to shut down operations for days or even weeks. Zero Trust’s micro-segmentation capability directly addresses this: by isolating network segments, it prevents a compromised node from infecting the broader environment. A real-world example is Google’s BeyondCorp initiative, one of the earliest and most cited Zero Trust implementations, which allowed Google employees to work securely from any network without a traditional VPN — maintaining continuity without sacrificing control. For most organizations, micro-segmentation means that even during an active incident, core operations can continue while the security team contains and remediates the threat.

Impact of Zero Trust Security on Team Productivity with AI Tools

Security is a top priority, but it should not come at the cost of team productivity. This is where Zero Trust excels: it delivers robust protection without creating friction in everyday workflows.

Seamless Security through AI-Powered Access Decisions: Traditional security mechanisms — such as manual approval workflows and blanket VPN access — slow teams down. Zero Trust replaces this friction with intelligent, automated access decisions driven by AI. Tools like Microsoft Entra ID (formerly Azure AD), Zscaler Zero Trust Exchange, and CrowdStrike Falcon continuously analyze user behavior patterns, device health, and location context to make real-time access decisions. When an anomaly is detected — such as a login from an unfamiliar geographic location or an unrecognized device — the system does not simply lock the user out. Instead, it prompts for an additional authentication factor (such as MFA) and grants adaptive access. This keeps legitimate users productive while still enforcing strict security controls.

AI-Powered Automation: Faster Incident Response: Zero Trust environments also leverage AI-driven automation to dramatically accelerate incident response. Rather than requiring security teams to manually triage every alert — a process that is both slow and error-prone — AI tools can automatically initiate containment actions in real time. For example, if a device is flagged as compromised, the system can isolate it from the network instantly, without waiting for human intervention. This reduces mean time to respond (MTTR), minimizes downtime, and frees IT teams to focus on strategic priorities rather than reactive firefighting.

How to Start Implementing Zero Trust in Your Organization

Adopting Zero Trust is not an overnight project — it is a phased journey. Here are the foundational steps organizations can take to get started:

1. Identify and classify your sensitive data and assets. You cannot protect what you cannot see. Begin by mapping your most critical data, applications, and systems. Understanding what needs the most protection is the starting point for any Zero Trust strategy.

2. Enforce strong identity verification. Deploy MFA across all users and systems. Adopt an Identity and Access Management (IAM) platform — such as Okta, Microsoft Entra ID, or Ping Identity — to centralize and enforce identity policies.

3. Apply least-privilege access. Ensure users and systems can only access what they strictly need. Regularly audit and revoke excess permissions. Role-based access control (RBAC) is a core building block here.

4. Segment your network. Implement micro-segmentation to isolate workloads and limit lateral movement. Solutions like Illumio, VMware NSX, or Zscaler can help enforce this at scale.

5. Monitor continuously and automate response. Deploy behavioral analytics and SIEM/SOAR tools (e.g., Splunk, Microsoft Sentinel) to maintain real-time visibility and automate threat response. Zero Trust is not a set-and-forget model — continuous monitoring is essential.

For reference, the NIST Special Publication 800-207 provides a comprehensive framework for Zero Trust Architecture that organizations of all sizes can use as a blueprint.

Conclusion: The Case for Zero Trust Security

As cybersecurity threats continue to grow in volume and sophistication, organizations can no longer afford to rely on perimeter-based defenses built for a different era. Zero Trust Security offers a modern, proactive framework that strengthens data protection, reduces financial and reputational risk, and ensures business continuity — all without sacrificing team productivity.

With AI-powered tools and phased implementation strategies, Zero Trust is more accessible than ever for organizations of any size. Whether you are just beginning your Zero Trust journey or looking to mature an existing program, the investment pays dividends in both security resilience and operational efficiency.

Ready to build a Zero Trust strategy tailored to your organization? Contact our security team to explore how we can help you get started.

More Blogs: The Ultimate 7 Transformative Advantages of Multi-Cloud Strategies Empowering Modern Enterprises

  • Copyright © 2026 codelynks.com. All rights reserved.

  • Terms of Use | Privacy Policy